The Owl Boxes - A take out box on the left and a pillow box on the right.

TIP: The pillow box is super easy to make, the true trick is making sure your score lines follow the guides. To make it so you don't have to print the guides on your project I highly suggest printing the guide/scoring lines on plain white copy paper in black. Before scoring I place my guide sheet over my project making sure that everything lines up. Then I press hard while I score my lines and I score through both the copy paper and the paper I printed my finish box on. Easy as pie!
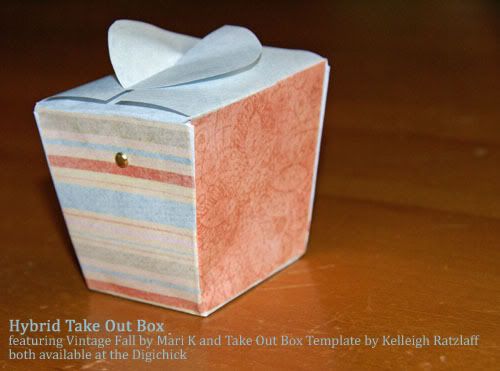
TIP: For the Take Out Box the first time I made it I pasted the flaps inside the box rather than outside. This gives the box a totally different look as you can see below. You can do it either way depending on the look you want. I have to say though that the box is much easier to construct if you put the flaps on the outside. I held the box together by using my Crop-a-dile to punch a hole in the side of the box where the two flaps overlap and then used a simple gold star brad to hold all the layers together. This is so much easier then trying to glue it together. Here's my ooops box.
TIP: The size of the box is adjustable, so unlike the plastic templates you buy to make with traditional scrapbook paper, you can alter the size. If you have access to large format printer this means you can make really big boxes. For the rest of us with normal ink jet printers it means that we can make cute little boxes. Just remember that if you use the first tip and then you re-size your box you'll need a new folding template. I high suggest some kind of file to keep your scoring templates in so you don't have to reprint each time you make a project.
Speaking of re-sized boxes here's a project where I used the Fancy Bags template and reduced the size of the template and then duplicated the layer so I had two bags on one piece of standard cardstock. I used two different digi kits to make the bags so I had to different finished projects. (I actually printed these little bags on standard copy paper to make it easier to fold them.)
Little Hybrid Fancy Bags (That is an espresso cup)

Regular Sized Fancy Bag (sorry I didn't leave anything to show scale)

TIP: My only tip for the fancy bags is if you make smaller bags use the lighter weight paper, but make sure you don't score right through the paper like I did on a few samples. Also, don't be afraid to really decorate them up.
My favorite template so far as been the Tall Box Template. I find these templates so easy to customize and make the most adorable boxes. Plus, I used the HP Laser Printer at my old job to print most of these and the color turned out incredible! I did print these on cardstock and so you are aware the top prints on a separate sheet from the bottom.
TIP: When printing multiple Tall Boxes group the tops together on one 8.5" x 11" sheet so that you don't waste paper. Also, decorate up the lid, there is plenty of room to play up there on the top section. Just make sure you take a look at the guide to see how far in the score marks go.
TIP: While you are decorating up the top with digital embellishments you can also make yourself an easy to print tag to add to your box. The ideas are endless on how you can use this template!
Here are some of my samples using Kelleigh's Tall Box Templates


Think outside, or rather inside, the box with what you can do with these templates. You can make all sorts of different little gift containers for the holidays or little treat bags for Thanksgiving, the choir, teachers, neighbors, etc. I'd love to see what you made using any kind of box template and digital papers, or if you're a traditional scrapper for that matter. The fact is that I love paper and love to make little things with paper so link me up in the comments to your favorite box project for some inspiration.
If you'd like to check out Kelleigh's templates you can see them at the Digichick
http://www.thedigichick.com/shop/manufacturers.php?manufacturerid=72&catid=268&dsefu=off
Have a great day!