Friday, September 23, 2011

Halloween Hybrid Boo Package


Yeah for the first day of Fall!!!! It's my favorite time of year!  To celebrate I put together a little Boo package to give to a co-worker to kick of the annual giving of a little Boo gift around the office (works great in neighborhoods too!)

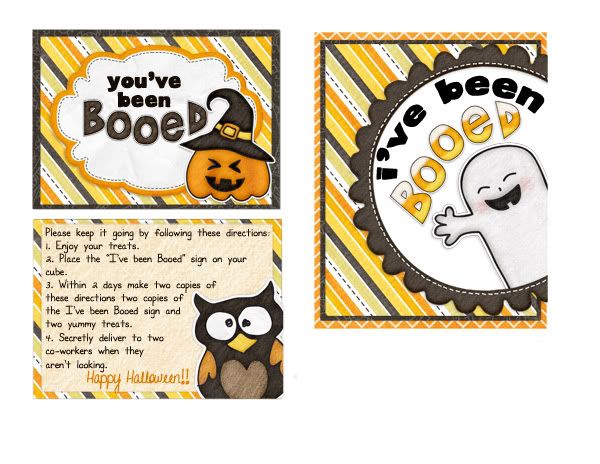
This project was very simple to create!  I used Lliella's Designs Halloween Doodles digital kit to create the card on the top of the box and the "I've been Booed" sheet inside.  Using Photoshop Elements I created the outside and inside card panels which were affixed to a orange cardstock card on the top.  I create the "I've been Booed" sheet on the same print sheet (also in Elements) so I only needed to print one time.  Here's what my print sheet looked like:
After printing I trimmed, mounted and was ready to fill my recycled product box.  Inside the box I tucked a bag of the Brach's Autumn mix (a classic Fall treat in my book) and some homemade ginger cookies tied with white sheer ribbon.  To tie the box closed I cut two slits in the front of the box and slid the ribbon through the holes and tied.  The black ribbon and button were hot glued on.

Here's some more pics of this fun project.  I hope you will give it a try!!!


Monday, August 01, 2011

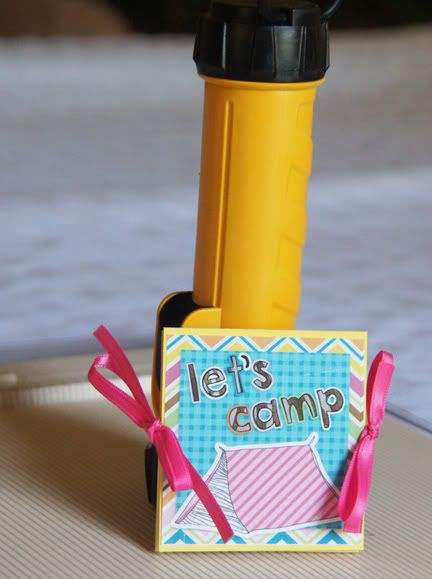
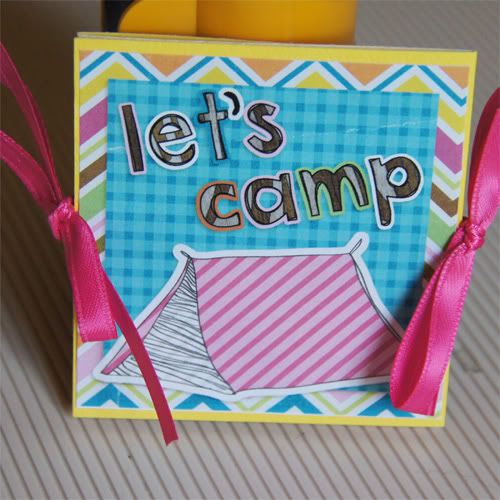
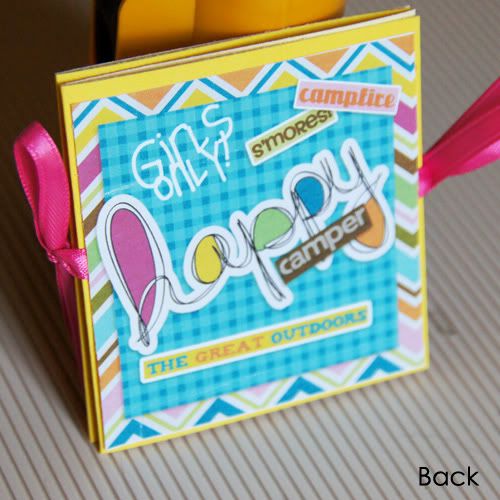
Let's Camp Invites

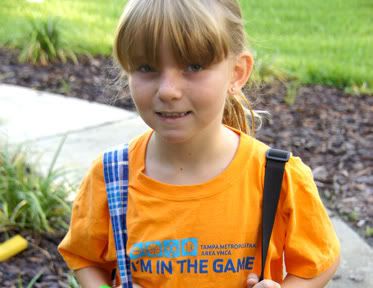
This is my daughter Hannah.  She is my baby, little sporty girl, THE ultimate daddy's girl and she's turning 9 in a few weeks. (I can't believe it!)  After spending months talking about what kind of birthday party she wanted to have this year, she finally settled on having her first sleep over party at our house.  She chose a camping theme and we agreed on only inviting 3 friends to keep things civil. (I've learned from experience that with sleep overs less is more!)

Now it's my turn to think of ways to use the camping theme to turn this into a really fun party for my special girl, her friends and my two assistants (my older daughter Katie and Katie's BFF Nikki).  Hannah hired Katie and Nikki to be her personal party assistants.  They are in charge of treating Hannah and her friends like gold while providing lots of fun and entertainment - certainly seems like a good deal to me.  $15 for two party entertainers for a whole night....wow!

I've been scouring the Internet for ideas for the party and while I did come across some pre-made invites that were kinda cute I can't pass up the opportunity to make her invites.  I can't remember the last birthday party we had where I didn't make the invites.  It's a tradition!  I'm now looking for party supplies, games, activities and more activities so that the girls will stay entertained throughout the night.   Check back in over the next few weeks more details on the party - for now...enjoy these cute little invites I came up with.  Who wouldn't want to come to party with a fun invite like this?

Theme: Camping Sleep Over
Colors: Turquoise, Pink, Yellow and Purple


Here's how I put this together.
Supplies:
Happy Camper digital scrapbook kit by Jenn Barrette at Sweet Shoppe Designs
Photoshop Elements 7
White Printer paper and inkjet printer
Fiskars paper trimmer, scissors, Scotch tape, tape runner
12 x 12 yellow card stock 
Pink ribbon (Michael's)
Martha Steward Score Board

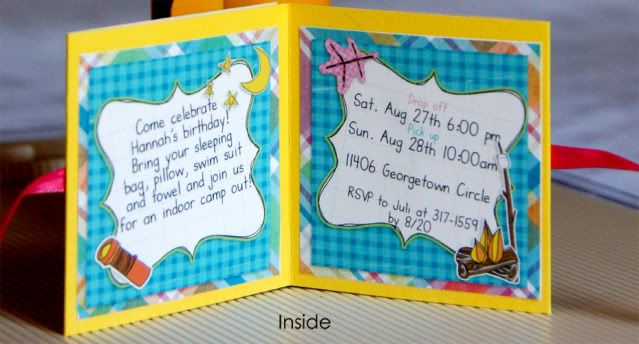
1.  I opened Photoshop Elements and created a 3 in x 3 in canvas to design on.  I started by designing the front and back panels at 3 in square each.  I then designed the inside panels at 2.75 in x 2.75 in each. 
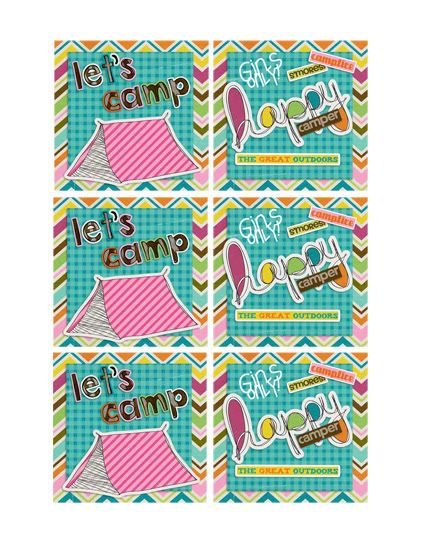
2.  Copy each panel and layout on 8.5" x 11" sized canvas in Elements.  Repeat for how many invites you need.  I ended up putting all the fronts and back on one piece of paper and all the insides on a seperate piece of paper.  (see my print sheet below)
3. Print out using a color printer on to white printer paper. 
4. Cut out all the panels using a paper trimmer and set aside trimmed panels.
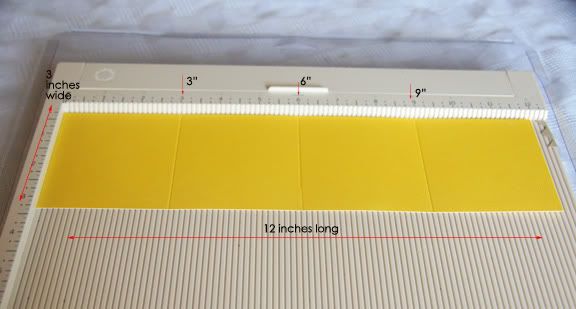
5.  Use the paper trimmer to cut a 3" wide x 12" long piece of cardstock from a 12 x 12 piece.
6.  Use the Score Board to score at 3", 6" and 9" along the 12" side.  (see pic below)


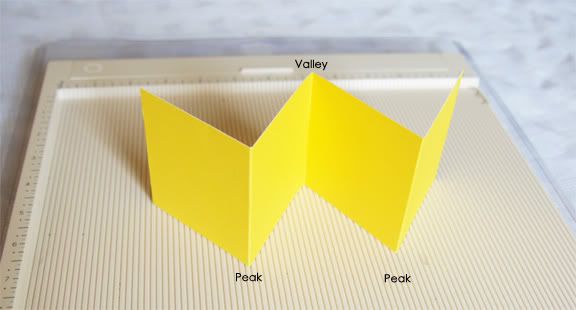
7.  Fold the cardstock strip to create 2 peaks and 1 valley (see pic below)


8.  Adhere inside panels on to the folded invite using a tape runner or your favorite adhesive.
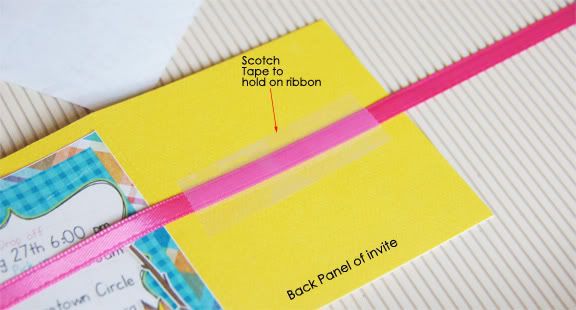
9.  Before adhereing the front and back panels I adhered a 12 in. piece of pink ribbon using Scotch tape to both panels.


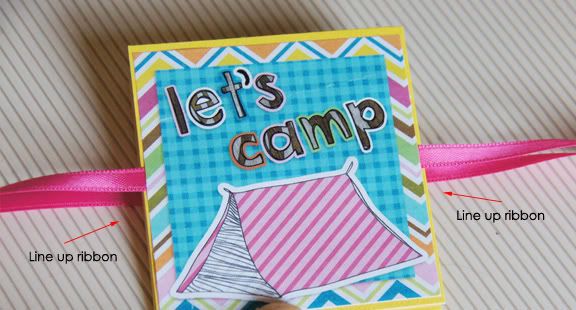
 I made sure that the ribbon lined up so that when the invite is closed the two pieces will come together on each side to tie the invite closed.  (see pics below)


10.  Adhere the front and back panels over the ribbon using tape runner or your favorite heavy duty adhesive. (You don't want the force of tieing and untieing of the ribbon to rip off your decorations.)
11.  Tie each side of the invite closed, slip into an envelope and you are set to delivery a party invite that is sure to get your guests excited about their upcoming adventure!

More pics


Wednesday, October 06, 2010

Treat Bags and Boxes Part III

Today I have two more cute Halloween themed treat boxes for you.  I'm having so much fun creating these...I'm going to have to find some new friends so I have enough people to hand these out to when this is all done.  LOL!

My first box is actually one I created last year and it's one of my all time favorite hybrid projects. 

My not so scary Dracula fang teeth box, uses a simple coffin box template I found HERE.  I printed the box template and constructed the box out of SU Basic Black cardstock.   I then worked from the template to create the box cover in Photoshop Elements.  I cut out the bat and bent its wings a little before adhereing to the box front.  I then created a slim card to slide in side -he,he...love the saying!  I filled the box with some Carmel Apple Candy Corn that looked like bloody fang teeth (well at least a little).  What a cute little box to give to someone with a little sense of humor!

My second project for today using a cutting file for a box...the only thing is I didn't use my Cricut!  That's right.  A lot of the cutting files you can purchase for electronic cutting machines also .PSD files that can be used in Photoshop Elements (or other photoeditting software).

 I used The Cutting Files' Gift Basket template/cutting file to create this cute little party cup.    The digital kit I used is called Scary Confectionary by Julie Billingsley and Traci Reed available at the Sweet Shoppe.  I love the fun colors in this kit!!! 

To create the little treat basket I just opened the cutting file in Elements and then used it as a clipping mask to create the final project.  I made sure I used large shadows to keep the elements/decorations looking realistic.  I then printed out on to presentation paper and score, folded and assembled my box.  I chose to fill my little treat box with the yummy Ghost Marshmallows (which look oh so cute floating in hot cocoa!).  I think these are perfect little cups to put on a table for a party!

I'm working on part IV of this series, so check back with me closer to the weekend for the next installment.  Until then...happy hybrid crafting!!!

Friday, October 01, 2010

Treat Bags and Boxes Part II

Today I have a quick and easy trio of treats that are pefect for slipping in a little fun sized candy bar or a small bag of mixed treats.  These cute little pumpkins are basically made out of a modified matchbook template that stands up to allow your treats to be tucked inside.  These little pumpkin treats are economical to make too - you can get three to a print sheet so there is not alot of paper used to make these babies!


I used Penny Springmann's I Want Candy digital kit to create these projects.  It was the perfect kit because she includes lots of cute pumpkin eyes, notes and mouthes to decorate the pumpkin face. 

Here's how to make these cute little treat boxes:
1.  Use THIS TEMPLATE to create three strips of orange paper to be your base of your pumpkin.
2.  In the section marked face, create the face of your pumpkin.
3.  Lighten the scoring lines to blend a bit with your paper and delete the text layer. 
4.  Print your pumpkins, trim, score and fold.
5.  I added some felt ribbon for the stem and then some green with white polka dots ribbon tied in a simple bow for the leaves.  You could even skip this step if you wanted. 
You're done - really it's that easy!


Wouldn't these be super cute to hand out to class full of kids or even at work.  You can adjust the width of the bottom fold (where the candy sits) to accomdate a larger or small sized treat.  If you are traveling with these I do suggest you adhere your treat to the bottom of the box so that you don't have candy flying everywhere (not that happened to me or anything.  LOL!)

If you'd like to see some more cute ideas for packaging....check this out!  The Blackberry Vine

Sunday, September 26, 2010

Treat Bags & Boxes- Part 1

I honestly believe that the most simple way to brighten a person's day is by giving them a little note or gift.  Over the next week or so I'm going to share some of my ideas for treat bags and boxes.  For me little tiny boxes and bags are my favorite hybrid projects.  I am a person that likes to "collect" packaging and then upcycle them into little gifts and projects. 


Today I used Lliella Design's adorable Boo kit to create two different treat boxes using recycled acrylic boxes.  The first box started life as packaging for a 4-pack of tape that my daughter got on clearance at Michael's. 


I added a paper band, flanked by some punched edge strips of orange paper.  I topped that with a pumpkin that I raised with a pop-dot.  The top of the box had a little fap that was used to hang the tape from a display hook.  I simple covered that with a larger piece of white cardstock and then a simple wrap around that says sweet treats.  I filled the back of the box withe some white tissue and then put the Tootsie Rolls in the front so I didn't have to use so many to fill the box. 

My next project is a recycled party favor box.

 I used the same Boo kit but this time chose a black damask paper and a cute little owl.  I created a rounded text box in Elements and then stroked the outside with a hot pink.  I used Darcy's Coffeeshopped Buzzed font in different colors to type "Save the Hooters".   Inside are "red" Starburst as a little "pink" reminder that October is Breast Cancer Awareness month and it's time to "check your hooters"! 

Check back in with me tomorrow for some other kinds of little treat bags and boxes sure to put a smile on your face (and someone elses).

Thursday, August 12, 2010

What's New?

I've been a busy little beaver lately!  Lots of layouts, lots of projects and some good news.  I was super excited to be selected to be a Hybrid Babe at The Sweet Shoppe.  This is a dream gig and I'm still in shock that I was selected due to the talent there.  My head has been spinning all week with project ideas and trying to figure out how I'm going to juggle all my other creative teams and SSD.

I've also been busy creating layouts and projects here are some newer projects I've worked on -
This is a pic of Katie enjoying Ft. Myers beach just a few minutes after we arrived.  Jason's mom decided to treat the girls to a night at the beach to start off their vacation with his family.  The girls didn't know where we were going to meet grandma so they were super surprised and excited to find out they were going to get to stay at the beach for a night. 


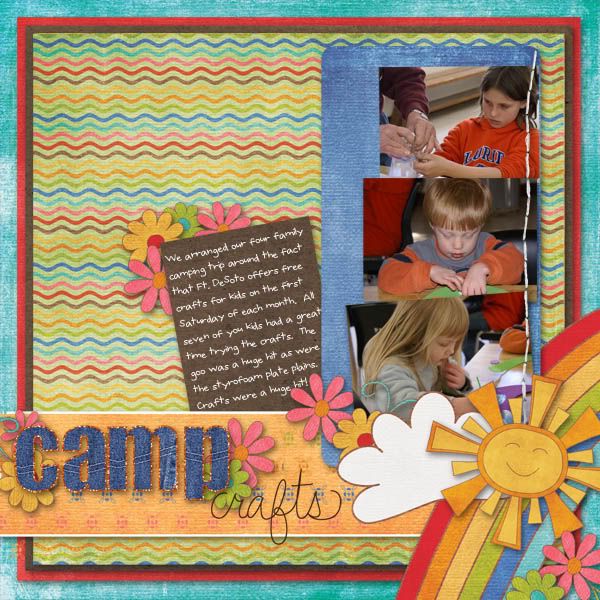
This is an older picture of Katie from when we camped at Ft. DeSoto last fall.

Another picture from our Ft. DeSoto camping trip last Fall.  Hannah really enjoyed fishing by herself for the first time.  She caught a cute little fish thanks to a kind stranger that baited her hook with some squid while Daddy was out paddling in the kayak.  (Mom prefers not to touch any kind of bait other than bread balls. he,he)

I Love You More Hybrid Wall Hanging featuring I Love You More by Traci Reed at Sweet Shoppe
Full instructions and up close photos are availalbe on Traci's Hawt Mama Blog - check it out!

A little sneak peek of Chelle's Creations new Element Pack coming tomorrow -
hint: check out those cute stars!

Game Time featuring Batter Up!, Doodley Do Frames (coming 8/13) and Doodley Do Shapes (coming 8/13) all at Scrap Matters


Come back by tomorrow - I'll have some sneak peeks for you and a super cute birthday party idea and invite.  My little Hannah is turing 8!  Wah!!!!

Tuesday, July 27, 2010

Happy Birthday Chelle of Chelle's Creations!!!

Today is the fabulous Chelle's birthday and to celebrate her CT is throwing a birthday blog hop just for you loyal fans.  Aren't you lucky?

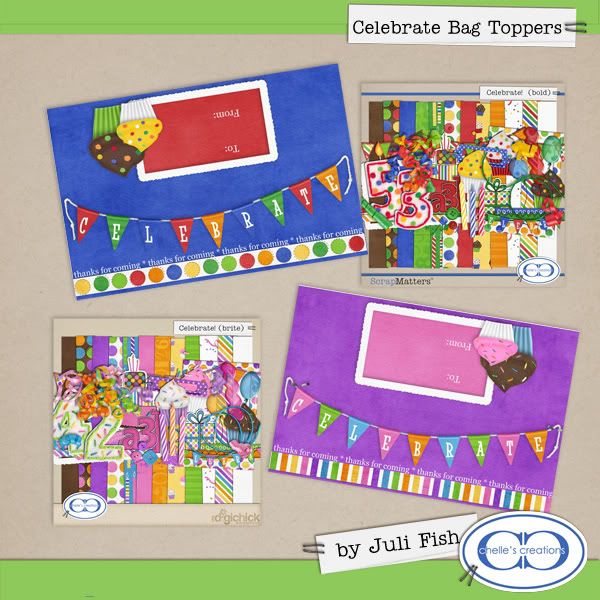
I decided to whip up some cute little bag toppers using Chelle's Celebrate bold and Celebrate brite kits.  The "To: From" layer and the "Thanks for coming" layer are seperate so you can take them out or change them to fit your needs.  The are sized to fit over the standard sized snack or sandwich zip top bag.
You can download this freebie HERE.

Looking for some more birthday freebies - then hop on along to these other great blogs to see what other goodies you can find.  All of today's freebies use the same kits so they coordinate for the perfect birthday bash!
Chelle's Blog (Stacey's freebie)

And don't forget...

Tuesday, July 13, 2010

10 for Tuesday

I've got an 8 am meeting at work this morning so this is going to be quick.

Today's 10 for Tuesday is...
THINGS THAT MAKE ME GIDDY

1.  Back to school shopping
2.  Hybrid Mini Scrapbook albums that have a clean design
3.  When my kids sing the quacamole song and shake their hips
4.  The thought of buying my laptop bag from a place call Big Bad Bags (Can I get one that is pink and black with a skull on one side and then orange with a pretty flower on the other - I need something to help me define my two sideness)
5.  Quilting fabric with neat designs
6. Craft fairs/farmers markets
7. Pedastal cake stands (preferably in white)
8.  Homegoods (period - the whole store)
9.  The sound of Hannah and Katie laughing
10.  When my husband gives me a compliment

Okay - so here's hoping early morning meeting plus mid-afternoon meeting (no lunch) means getting to come home early today.  Keeping my fingers crossed - this house needs some cleanin'

Monday, July 12, 2010

Monday...Rainy Monday

Well I had good intentions of walking this morning, but the rain is back. Figures... the pool is finally blue again.  I think that rain and the pool supply store might have a conspiracy going on...can't prove it yet but I'm working on it.  LOL!

Since I couldn't walk this morning (well I could have if I cleaned out hubby's office enough to put down the treadmill - but really that's just too much to think about first thing in the morning) I got caught up on my blog posting in the digiworld.  You can check out posts about some awesome Paper Bag Hybrid Projects on Traci Reed's Hawt Mamas Blog or you can check out the July Customer Spotlight over on Zoe Pearn's Blog.

Yesterday we took the girls to Ft. Myers Beach to meet Jason's mom and grandmother for the great kid handoff.  It's time for the girls to spend two weeks with Jason's family in Miami.  Now, we've had lots of complaining the last few days about this trip.  It's not that the girls don't want to go...it's just they don't want to be away from Mom and Day and Katie's first cell phone is being delivered tomorrow so she's really bummed she has to wait to get back to use it.  Keeping that in mind, I thought for sure that the drive down to Ft. Myers was going to be somber and there were going to be tears.  I was so wrong!

First of all Jason did a great job with keeping the girls guessing on where we were meeting his mom.  They knew we were driving to Ft. Myers and it had something to with the beach (because it's hard to hide sand toys in an SUV).  They kept guessing Daytona (which is pretty far from Ft. Myers).  So when the girls weren't trying to get Jason to give them more hints, we played "The Car Game".  The Car Game is when someone picks a number and then the referee (Me) picks what we are looking for - so 4 yellow cars, 2 motorcycles, etc.  For some reason yesterday everyone was giddy and super chatty and we played the Car Game for over an hour and it was FUN!  Hearing the girls giggle and try to distract each other so they could find the type of vehicle they were looking for was hilarious.  My girls are certainly inventive!  Jason got in on the game so then it became goofier - there is nothing better than a car full of giggly and happy family.  Sigh - good times!

When we finally got off the highway and started our journey towards the beach the girls were "eye spying" 7/11's.  Since the date was  7/11, 7/11 the store was supposed to be giving away free Slurpees.  You would think there were giving away a million bucks with how excited my kids were.  We finally found a 7/11 and Jason agreed to stop and fill up the tank so the girls and I jumped out for a potty break and searched for a free Slurpee.  Now Katie thought that there was no way it could be true...but sure enough we found the 7.11 oz (insert eye roll here) cups and each made our own drink and headed back on the road.  I couldn't resist snapping a few pics as I knew this would make a great layout.


The picture of the Slurpee on the dashboard is my favorite. The whole time I was taking it Jason was making sarcastic remarks about putting a Slurpee on the dashboard was a goofy idea.  Well, it's a darn good pic and it's fun and that's what makes me happy - so there!

To finish my story - when we finally got over the bridge and on to Ft. Myers beach the girls were super excited.  As they exited the car they were saying thank you over and over...I breathed a sigh of relief.  They were going to be fine going with Jason's mom...no tears or anything.  When we left they had just finished eatting ice cream and the girls were playing shuffle board as their break from the surf and the pool.  Life is Good!

Thursday, July 01, 2010

I am...

- trying to become a blogger
- someone who loves to make lists
- a mother, a wife, a daughter, an employee,a sister, and a friend (pretty much in that order)
- seeking something to add to my life to feel more fulfilled (and I don't mean a new husband or another child! ha!)
- a woman trying to get healthy and fit (not thinner and more beautiful)
- working on learning how to use all my camera's functionality

I am...a work in progress!

Well, yesterday turned out to be a pretty good day. My hands, mouth and head must have listened to our little conversation during my walk yesterday morning. Since yesterday was so successful I decided to walk again this morning. I brought along my camera hoping to capture some the of the beauty I witnessed yesterday. I left 10 minutes earlier and the light was awful, and the sunrise not nearly as beautiful as yesterday. Tomorrow I'm going to back to leaving around 6:20 to see if there is a difference in light.

I did capture an image I'd like to share with you. I've been following the Poppy Talk's Summer Colour Week project where pictures featuring the color of the day are highlighted and then everyone is invited to submit their own photos to share. Today's colors are red and white.  I found a great sign to photograph on my walk which I hope to share here tomorrow.  I've got some lunches to pack and a shower to take before I leave for work.  Bleh!

Before I forget...Today is release day at The Digichick. If you are a digital scrapbook addict, I mean fan...you should check this site out. I really love the diversity of kits they offer and the forum is really friendly. I have been honored to be on the site CT for over 2 years now and I have to say that every week I'm blown away at the kits and the layouts I find there.

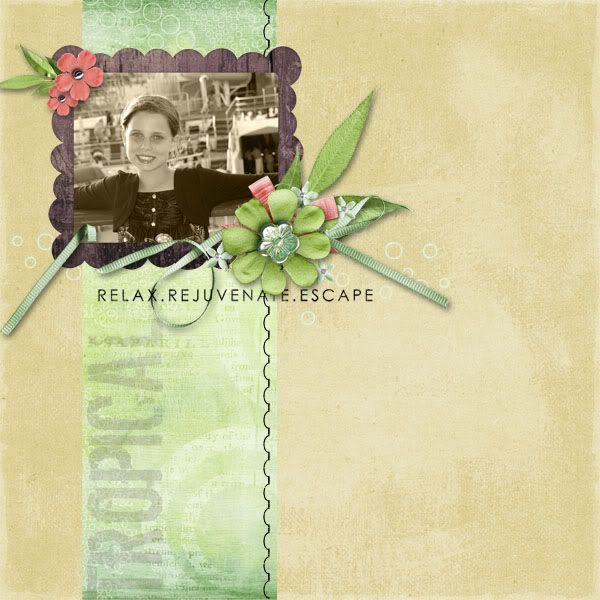
Here's what I made this week with Dani's Vacation Bible School Kit. This kit has lots of great bright colored papers and elements.  If you are into Sunday School or VBS there is some really cute word art included in the kit!

I also got to work with Girl Friday's lovely Minty Popsicle kit (oh how I love her tone on tone papers!)


New releases are 20% off today and tomorrow so go check it out and while you are there pop in the forum and say hello!

Wednesday, June 30, 2010

Wednesday? I thought it was Thursday.

I started my day with a conversation with Jason that went a little like this.
Me - It's Wednesday isn't it?
Jason - Yes (in a are you going mad tone)
Me - Damn! I thought it was Thursday...I'm really hating work right now.
Jason - I think it feels like Sunday. I'm so tired.

Yeah, life has been feeling that way of late. I think our little trip to Savannah in a few weeks is going to be a good thing for us both!

After that non-inspiring conversation I pulled myself out of bed, looked at the clock and decided to actually go for a walk. I think I'm going for a walk every morning when I wake up...but today I actually did it. I have some online digiscrap friends that are working on Couch to 5K (which I'm trying to get my 11 yo daughter to try)...here I am working on bed to 1 mile walk. LOL!

My mind was all over the place this morning during my walk but I managed to focus long enough to come up with a list of 5 things that made me smile today -
1. The sound of water rushing through the storm drains - this means no drought this summer and everything is so green and beautiful because of it.

2. A gorgeous pink and purple sunrise peaking through the roof tops of my neighbors' houses. (Is this out here every morning? Maybe I should walk more often?)

3. The lake behind my subdivision looked like a vacation get away with white ibis feeding in my neighbor's law and white egret flying by. The gorgeous sunrise was reflecting in the still water - it was so pretty and peaceful!

4. The partial rainbow peaking through the clouds as I walked to the West.

5. Little birds jumping from limb to limb having a cute little conversation with each other. Tweet, tweet.

I've gained 4 pounds in the last week so I'm really glad I got up out of bed today. Something has got to give! I tried having a conversation with body while I walked. It went a little like this -
Hands - I know you have the need to stay busy and that along with the rest of my body you are not totally in to work right now, however, it's time for you to find something else to do other than giving food to mouth. Please take up knitting or even finger tapping and stay away from food.

Mouth - Just because hands gives you something to eat does not mean you actually need to eat it. The hands don't ever get fat so they don't care about the rest of the body. You are supposed to be the goal keeper - so help out the team and stop chewing already.

Head - I know you have this issue that you feel the need to make me dizzy if we don't eat constantly. Stop. It. Now. I promise we aren't going to starve and that eatting little bits of heathier food will make the whole body feel better. I'll get you some head massages courtesy of thighs and butt if you'd knock of the dizziness and let us all go longer without eatting.

We'll see where this goes - I have been eating much healthier this week. Unfortunately I'm just adding the healthy foods to my normal consumption instead of swapping out...but I'm working on it. One moment. One day at a time.

Note to self: Refer to things that make me smile list above when you are hating life at 2:30 today. The inspiration and drive to work has to come back...maybe it's just on vacation right now.

Friday, June 18, 2010

Tie One On for Father's Day

Not sure what to give your Dad or your honey for Father's Day? My favorite gift to give is a gift card (especially to my step-dad!). For the man that has everything - here's some money to go buy something fun to tinker with - really, is there a better gift? I don't think so.

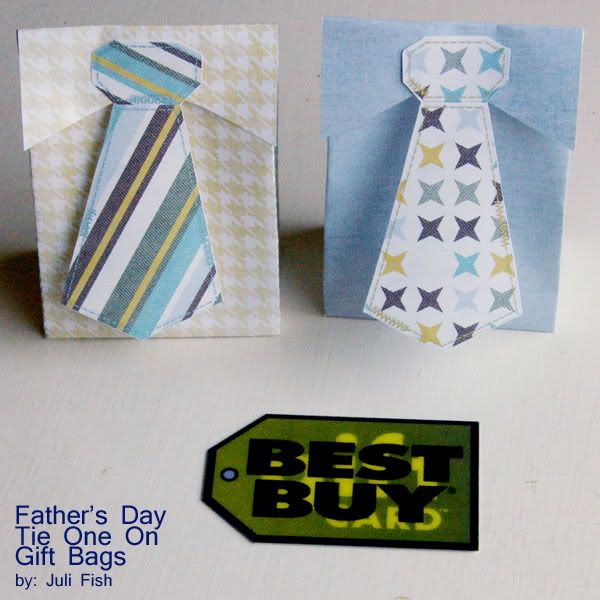
Finding a unique way to give a gift card can be a daunting task. I like to be creative and find something different so the reaction is - oh, a card...great I bet there is a gift card in there...how thoughtful. Bleh! Inspired by some bags I saw at Twig and Thistle, I create these tie bags using my digital scrapbooking/digital hybrid supplies. I just know these are going to be a hit!


Supplies -
He's The Man digital kit by Traci Reed and Dani Mogstand at Sweet Shoppe
Fancy Bag template by Kelleigh Ratzlaff at The Digichick
Ruler, scoring tool
Scissors
Double stick tape
Gift Card

1. I opened the Fancy Bag template in my photo editting software. To make the collar looking flap I modified the wavy flap edge by creating a basic rectangle to go over the flap. I merged the rectangle to the base template layer to make a new template.

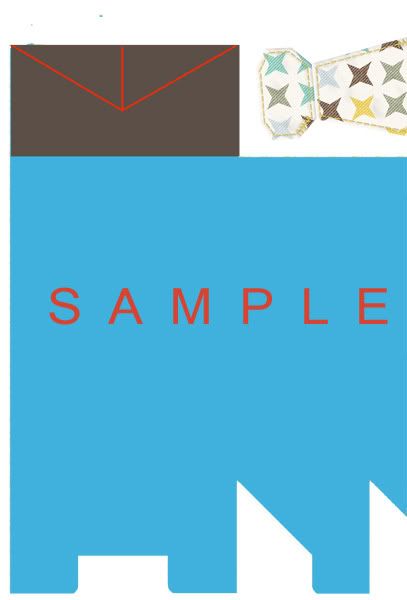
2. I placed the tie element from He's The Man on to the bag to size. Once I had the tie sized correctly I rotated it and placed it in the open spot above my bag template so it could print on the same sheet of paper with my bag.
Here's a little peek of what my revised template looked like:


3. I used my newly revised bag template created in Step 1 as a clipping mask. I used the papers from He's The Man for the base of the bag and chose patterns and colors that would compliment the ties I chose.

4. I printed my project on to white color laser paper (my printer still won't take a sheet of cardstock -phooey!). I cut using scissors and then scored with a ruler and scoring tool.

5. To make the collar out of the flap, I eyeballed what I thought was half way across the flap and cut up with my scissors about 3/4 the way to the fold. I then made an angle cut from the left edge of the flap up to straight up the middle cut and then repeated on the right.

6. I quickly assembled the box using double stick tape. Inserted my gift card and then attached my tie.

Seriously - it took about 10 minutes to make all together and it's a totally adorable and unexpected little something for Father's Day.

Wednesday, March 31, 2010

Wishing my life away

I've found myself wishing the days away this week. You see, it's almost spring break! We are taking the girls on a 7 day cruise and I'm so freakin' excited. I'm not sure if it's the whole being away from work thing, or the no housework or cooking for a week thing...but I really can't wait. It's like being a kid a Christmas time all over again. Makes concentrating at work really hard.

I've been spending my time at Cruise Critic reading the boards for ideas and getting to know some of our fellow passengers. If you are planning on going on a cruise, Cruise Critic is an awesome site to visit before you book and then while you are waiting to cruise - careful, it's addicting!

In between now and our vacation departure it's field trip season. Katie has 3 field trips in the next week and a half. Each one requires her to be at school early or for me to drive her, plus world drum practice every Monday. She's getting to the age where I'm becoming a professional driver for her. (Well, minus the sparkling clean car and drinks and snacks - he,he). I can't believe she is in 5th grade - graduating from Elementary school. Where do the years go? (apparently with me wishing my life away to get to my next cruise)

So in between doing piles of laundry, driving kids, going to work, making dinner, yadda, yadda, yadda - I got some scrapping done this week. Here are a couple of layouts done with some new releases at the Digichick (coming tomorrow, April 1st).

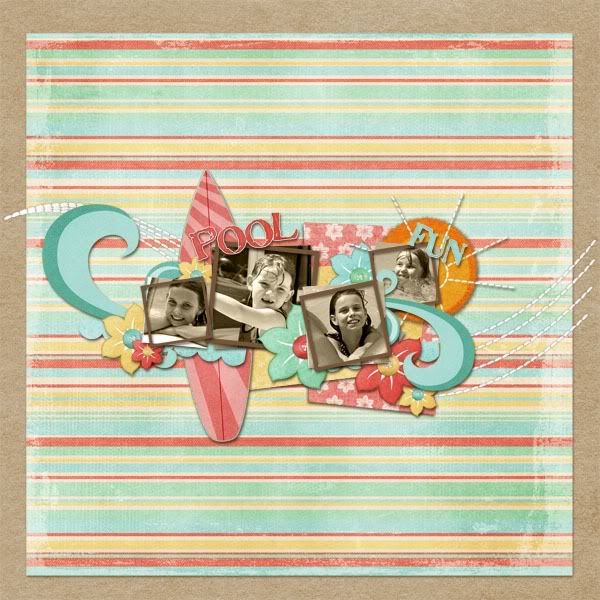
Pool Fun - featuring Seasons of Change by Karen Lewis and an awesome new template pack by Nikki Epperson


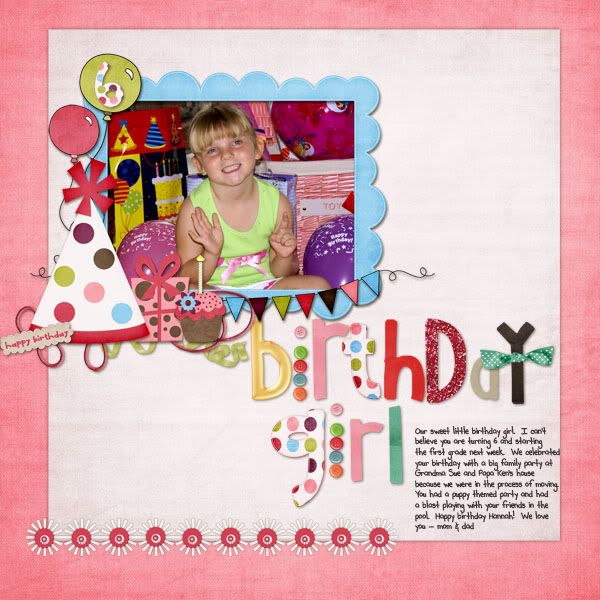
Birthday Girl - featuring Cuppycakes by Jennifer Fox and that adorable alpha is by Sarah J - who I am so glad is back at The Digichick!


Stay tuned folks! If you haven't voted on your favorite Hybrid Project for Kelleigh Ratzlaff's Blog Hop then see the post below - hop along to all the blogs and vote for your favorite project. You could win $10 to Kelleigh's store.

I've got a few new Traci Reed hybrid projects coming up next week for you. Off to search for some inspiration. Have a great day!

Sunday, March 28, 2010

Blog Hop Monday!

It's super, hybrid blog hop day! So if you are in the mood for a ton of great hybrid ideas using Kelleigh Ratzlaff Designs' fabulous templates you are in for a great day. Grab a cup of coffee and come hop along! Did I mention there's a prize? Make sure you hop to Kelleigh's blog and comment on which of the projects you liked the best (vote for me!). You can win a gift card to Kelleigh's store at the Digichick and I could win too!

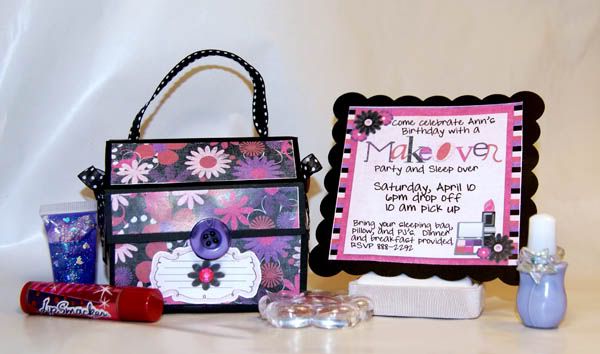
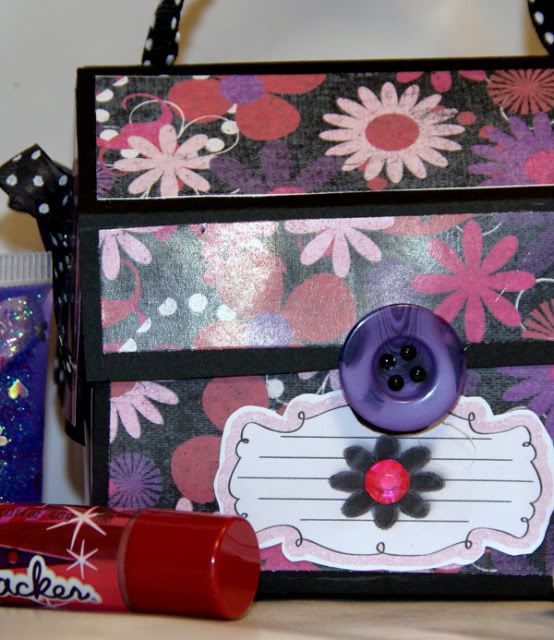
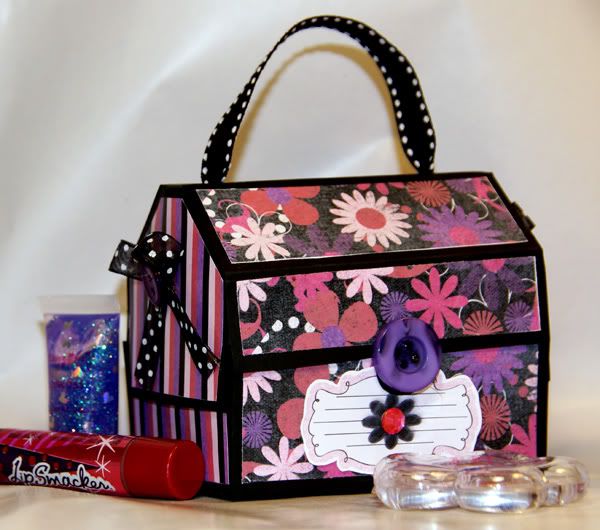
My project features Kelleigh's Toolbox Template (The Digichick) turned into a makeup box party favor. I mixed it up a bit and made it all girly!


I used Traci Reed's and Meghan Mullen's Girl's Day Out (Sweet Shoppe) kit to decorate the box. To make this easier on me - I opened Kelleigh's template in Photoshop Elements and colored the box black. To figure out how big to make each of the paper pieces I used the shape tool to make a template for each section by making the box just smaller than the actual box. I then moved all the pieces to a printing sheet. I printed on glossy presentation paper and trimmed. I pasted the decorative pieces on to the box before assembly (makes things much easier!!! I added a simple ribbon handle, a button and some little bows on the side to make this extra girly. What little girl wouldn't love this as a birthday favor??

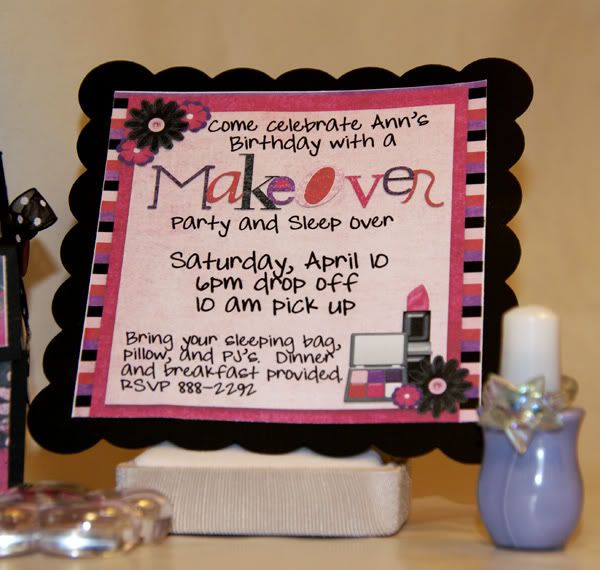
For the invite I used my Cricut to cut the 4" scalloped paper for the background. Everything else was done in Elements.

Here's a few close up shots for you.


For more awesome hybrid ideas hop along and check out a few more cool projects on the blogs below.
Kelleigh
Tracy
Sally
Laura
Julie
Christy
Dana
LuAnn
Jacinda
Viva
Dalis
Holly
Sharyn
Karen Lewis
Linda
Alice
Meg
Sunghee
Carolina
Debbie
Kim

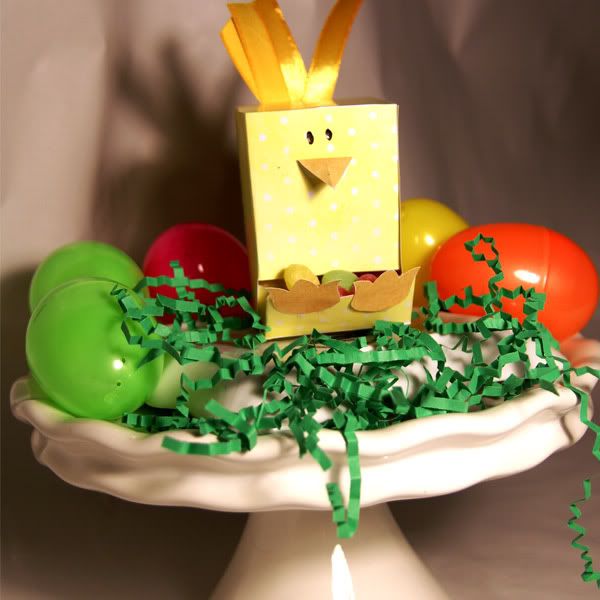
Have fun hopping! Oh yeah and as a bonus for my readers today....come check out my post on Eva Kipler's Blog for a step by step on how to make this adorable Chick Candy Dispenser using another of Kelleigh's rocking templates!